Tuesday, August 4, 2009

Where has the time gone?

So I'm a terrible blogger! I didn't post once during the month of July. So here it goes, I'm going to attempt to keep up with this wonderful site! Today's topic....nail salons!

I went on Sunday to have a relaxing pedicure with my boyfriend's sister and mom for their birthdays. I was excited because I usually start my summer off with a good pedicure to get rid of my dry winter feet, but because I didn't have a job, the trip was postponed a little bit. The pedicure started out great! The spa looked clean and wasn't packed. We got seats right away and we were off.

...and then I realized. I had the tech from you know where! He didn't really speak English....only knew the words that were in reference to the price sheet. I wanted to have my fingernails repainted, but he couldn't understand that, so I stuck with just the toes.

As the pedicure moved on, the more pain I was in. I must have been in dire need of exfoliation because this guy went to town! I couldn't decide if I was being tickled so much it hurt or if it just plain hurt! I didn't think I was going to have any skin on the bottom of my feet when he was done. YIKES!

I managed to pull through and really loved then end of the pedicure because it involved a lotion massage of the feet and calves (I even remembered to shave my legs before I went! Ha!) I got a french manicure on the piggies because its the only thing I'm not that good at when it comes to painting. Figured I'd just let someone else do it.

The pedicure was finished and my toes were dry enough to put on my shoes. I got up to pay and as I did, I watched my tech pick up his tote of tools and get started on the next girl's pampering. Sounds innocent, right? Well let me tell you that all the tools that were used on my feet were being used on girl number 2 without being cleaned in between!!!! AHHHH! I'm not saying that I have some funky fungus that would be passed on, but what about the people that got pedicures before me? I didn't think to ask if the tools were sanitized...:( Maybe I'm going a little overboard, but I don't want my toes to shrivel up and fall off or something. What do you think? What's your best/worst nail spa story? I wanna hear 'em!

Enjoy your Tuesday!

Monday, June 22, 2009

Make-Up Tip Monday!

Hello friends! Make-Up Tip Monday is back! This time I've attempted to do a video tutorial. Now bare with me....its not the best thing since sliced bread.....it was a lot more difficult that it should have been to make this thing!

The video features a little info about foundation application and two different looks using the same three eyeshadow colors. Please watch and let me know what you think! If you have any advice on filming, editing, and publishing the video tutorials I would really appreciate the help!


Enjoy and leave me a comment!


**Edit** Sorry for the music being louder than me talking! I didn't realize it until I just posted the video. Let me know if you have any questions. The next video will be so much better! Promise!

Sunday, June 21, 2009

NYX???

Alrighty my make-up guru's....I have a question. I am looking into purchasing some new products for my freelance kit and, I won't lie, for my personal use... :) I have looked on the website NYX Cosmetics, because I've been reading about it on all your blogs and I want to know your opinion of their products. What do you think? Anything to die for? Let me know what you think!!!

Wednesday, June 17, 2009

Review: Daily Moisturizers

Good day to you all! I thought, since summer is upon us and the weather is getting perfect for sundresses and swimsuits, I would let you in on a little secret. I have found the best accessory to go with any little yellow polka-dot bikini or pair of jean shorts! Wanna know what it is?!

The perfect accessory is.....beautiful SKIN!!! So to keep your skin supple and ready to be exposed, here are a few moisturizers I have tried and LOVE LOVE LOVE!

  1. Nivea Pure Moisture -
This moisturizer is wonderful if you want to have smooth, healthy looking skin! My skin had a hard time with the transition of climates when I moved from KY to FL and this is the only thing that I found to help. I put it on right when I get out of the shower, when my skin is a little damp and I works wonders.

2. Neutrogena Intensive Moisturizer -

This is such a great face moisturizer. It has an SPF of 20 and also wrinkle fighting power! Great for the summer and any other season!!

3. Jergen's Natural Glow -

If you can't make it into the sun too often, this little puppy will help you build a tan or maintain your glow. It doesn't have the terrible tan-in-a-can smell and it doesn't turn you orange!

I hope these little reviews have helped and will add to a wonderful summer with beautiful skin!

Tuesday, June 16, 2009

Nobody can be uncheered with a balloon!

Hello my magnificent make-up lovelies! How are you today? Here's my latest playing....I was riffling through my freelance kit and found a ton of quads that I have never used!! This palette is from MAC Balloonacy. I wasn't a huge fan of the line. The signage just wasn't that attractive and I didn't get into it, but oh have the tables have turned...

Well, this weekend I decided I was going to work with the palette below.

I fell in love love love with the matte purple in the quad...Violet Trance. I am on a kick with matte eyeshadows. It started with MAC's collection called Matte2 (I don't know where the squared button is). Any ideas where I can find some other great matte shadows?

My pictures aren't the best, but the purple is soooo vibrant! I loved it. A great way to make my eyes look more green.

I used all four shadows in the look, along with Perky paint pot.
-Cloudburst: inner corner highlight and brow highlight
-Up at Dawn: lower lid, up to crease, about 2/3 out from inner corner
-Violet Trance: outer triangle on lower lid and smudged under lower lashes
-Pandemonium: crease and lower lashes

**MAC Fluidline in Blacktrack was used to line top and bottom and Maybelline Lash Stylist in waterproof black....this is the only mascara I can find that will keep my lashes curled all day long and not make them stick straight out from my eyelids like straw!

I am going to try my first video tutorial tomorrow....any suggestions on what I should do? Keep looking back for new things this week and keep your fingers crossed that the video turns out well!!

Thursday, June 11, 2009

FOTD: MAC Heatherette

Hi friends! Quick post today of my eye look. I really appreciate you all commenting on my posts. I apologize for the picture quality. I'm working on figuring out some lighting issues. If anyone has any suggestions, I would really appreciate it!

Today I used an eyeshadow trio from MAC from the Heatherette line.


The shadow colors are Hoppin', Mood Ring, and Cloudburst. I also used Tilt as my medium crease color.
There you have it. It was a very quick look because I had class, but worked well for me.

On a side note, I was wondering if anyone would be interested in seeing step-by-steps or tutorials for different make-up looks. If so, please let me know and I will start working on some!

Wednesday, June 10, 2009

Panda Does Makeup: Animal Instinct Contest

Good afternoon my makeup loving buddies!! I've been a busy girl today. Had a little free time so I decided to enter a contest. Rebecca over at Panda Does Makeup is hosting a contest. What you had to do was take inspiration from your favorite animal, be it fish, insect, mammal or bird, and create a look using make-up. I'm posting a few entries today....so here we go!

These are from this past Halloween. I did mine and my best friend's makeup for a night out. We were both tropical fish!
I used a combination of gesso, prussian, and chrome yellow MAC eyeshadows, blacktrack Fluidline liner and #7 lashes. Finished with red brick lip liner and Dubonnet MAC lipstick.

I used on Jess a combination of pink bronze, chartreuse, pinked mauve, and naval blue MAC pigments with the same eyeliner and lashes as above.

I was a four-eyed butterfly fish.And Jess was a Stoplight Parrot Fish....she's the biologist that knows everything about ocean life! I love her!And I did this today....
My favorite...the peacock!

Here is the progression of the application:
This is a combination of two MAC paint pots - Delft and Moss Scape layered with Flashtrack and Juxt eyeshadows.
I've outlined the beak with MAC fluidline - waveline and added MAC eyeshadow -orange with wet liner brush and Springtime Skipper (eyeshadow from the Barbie collection).
I added a combination of Gesso, Carbon, Flashtrack, and Springtime Skipper MAC eyeshadows to the right eye. Right eye is lined with waveline MAC fluidline and Classic Cream liquidlast liner. Left eye is lined with blacktrack MAC fluidline and Auto-Orange liquidlast liner.
Both eyes are finished with #7 MAC lashes.
Wish me luck!! I really want to win!!!

Tuesday, June 9, 2009

FOTD: Eyes

Hi friends! I hope you're enjoying my new site. I thought I would post a few of my eye looks from the past couple of days.
This picture is of two separate looks. The right eye is a gold/maroon combination. The right eye is a pink/ plum combination. The picture is not great, but I'm rockin' two different eyebrow styles as well. Which one do you like better?

This is a neutral color palette for everyday wear.

Same look, eyes open. Very subtle, but still noticeable.

Have a great day!!

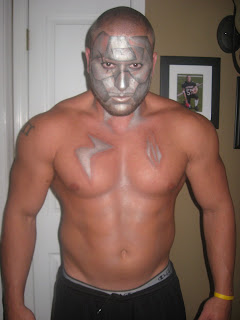
When I get bored....

So I built a transformer last night....his name is Awesomus Roboticus :)

What do you think?

Monday, June 8, 2009

A little of my work so far....

Just a few pictures of Halloween make-up I've done:

My best friend, Lauren, as a wood nymph.

Tiffany as an 80's rocker!!

I was a mermaid!

All 3 of us...can't see the make-up that well, but I thought the pic was cute!

Halloween at MAC...she was a witch and wanted something different. Those aren't her eyebrows...I had to blank out her's and then draw on new ones because she didn't have much lid space. I was a lion...the Cowardly Lion :)

Highlighting and Contouring

Aloha!! Happy Monday to you all! Hope every one had a great weekend. I made it to my movie last night and let me tell you....I LOVED IT! I can't wait to buy it and watch it again. It was actually really nice to go to the movie alone :)

I want to apologize for not throwing any tips your way last week. I promise this week I'm making up for it. So in review, we've gone over preparing the skin, choosing a foundation, which brushes to use, and concealer. We are now on to the fun stuff!!! COLOR!!

Today we will start with adding contour and highlights to the face!

Any of you ever have issues with not having high enough cheekbones or a double-chin or a large forehead? Did you know that you could fix all that with make-up? All you have to do is use different shades of color to accent the shadows and high planes of the face. When choosing the correct colors to use, keep in mind the finish as well. Your contouring color should be two to three shades darker than your base foundation color and have a matte finish. Your highlighting color should be two to three shades lighter than your base foundation color and should have a finish of anything but matte. For both highlighting and contouring, you have the option of using powder, cream, or liquid. I like to recommend powder for beginners and then once you get comfortable with the placement and blending, you can try liquid and creams.

This picture is kind of a template for where the different colors should go to shape the face.


This picture is definitely the on the extreme end of highlighting and contouring, but it maps out the perfect placement of color.

When contouring, I like to use an angled powder brush. It helps with getting in all the little nooks you need to accent.

I like to use a smaller brush when highlighting the face. Something that is fluffy and able to gently brush on the product.

Some of the best tips that helped me when I first started contouring and highlighting were these:

1. When contouring, have your light source coming from behind. This will help project shadows on your face and help you locate the areas of the face that are to be darkened.

2. When highlighting, imagine yourself walking through a piece of cling wrap. The parts of the face that hit the cling wrap first are going to be the areas that you will highlight.

3. Add a touch of your highlighting color to the inner corner of the eyes to brighten up the face!

This takes practice, but is very beneficial when you get the technique perfected. It makes such a difference, especially in photographs. Good luck and let me know if you have any question!!

Concealer

Hello hello!! How is everyone today??

I want to thank you ladies for submitting your questions on the last make-up tip post. I want to answer some of those now. Last time we talked about foundation application. My lovely followers expressed that they didn't like the squishy make-up sponges, which is a great thing! But they had questions on if using your fingers is acceptable. You have to think of it this way.....you wouldn't paint a nice picture with your fingers, so you wouldn't want to do your make-up that way either. Using your fingers doesn't allow for an even application and can make things streaky. Other than the streakiness, using the fingers on the facial skin, whether clean or dirty, adds unwanted bacteria and it increases the oil production on the face. So if you're having issues with oil, this could be a reason.

Now for the new stuff....we've talked about prepping the skin, picking a foundation, the proper brushes to use, now we need foundation's best friend....concealer! There are many misconceptions I'd like to clear up about concealer, because it can be your best friend too!!

Concealer's purpose is to cover up any unwanted spots or discoloration. Concealer can be used with or with out a foundation and should be applied with a brush. Because of the area you would be placing the product (under the eyes) is very sensitive, using a brush will not cause as much damage to the outer skin and underlying tissue. Also, if you are using the concealer to cover up a pesky pimple, you don't want to add more bacteria to and infected pore by using your fingers. Using a brush that is smaller with condensed bristles will allow you to cover up almost anything!!!

When choosing your concealer color, I always like to go one shade lighter than your foundation color. This will bring a highlight to the under-eye area and will decrease the look of of a blemish. Gently pat the color on the needed areas and blend out.

Most people think that concealer goes on before foundation, but after a few trials and errors, I've found that you can achieve a much smoother look with better coverage if you put the concealer on after the foundation. You won't get those darkened spots on your face that won't buff out! So try that out and see what you think!

When it comes to color of concealer, I like to recommend something that is in the rose family as apposed to the golden. This is great for covering the purpleness under the eyes and redness of blemishes.

So there you have it! Another Make-Up Tip Monday! Please let me know your questions and if there's anything specific I need to talk about! I'm doing this for you!

Good evening, goodnight, and goodbye!

Foundation Application Techniques

Over the past few posts we've been working ourselves up from the beginning of make-up applications. We've talked about skin prep, choosing the right foundation, and now we will discuss foundation application!

To me, proper application of foundation is just as important as the make-up its self. Most foundation wearers are stuck in the era of the sponge....


I cringe when I see these things. Now they are good for cleaning up eyeshadow flakes after application, you know, the little sprinkles you get under your eye after you've put your shadow on? But I do NOT recommend using these sponges for foundation, whether it is for powder, cream, or liquid. Why? For these reasons:

-if you are using a liquid or cream, the sponge soaks up your product and doesn't give it back!! You are wasting anywhere from 25-50% of the product you paid hard-earned money for!! Stop! Thief!!

-the purpose of a sponge is to absorb....so its going to absorb anything on your face that it can. The sponge will soak up all the oil and bacteria on your face and the give all that yummy stuff a home to reproduce! YUCK!

-a sponge will not lay or place product on your face like a brush will. Like I mentioned before, the sponge wants to soak up the make-up, so its not going to give you a smooth, even application.

-when you use a sponge with a powder foundation, do you ever get a dark crusty layer that appears on the top of your compact? Well that is the oil from your face that the sponge drank up and spewed out on your precious make-up.....more yummy bacteria! Yes!

"What do you recommend, Meagan?" you might be wondering...

BRUSHES

That's right ya'll, BRUSHES! There are a variety of brushes available to you that will help with your foundation application.

For liquid and cream foundations you can use any brush you want. The more compact the bristles on the brush, like the brush third from the left in the picture above, the more product you will be able to pick up. This brush will give you a lot of coverage. The proper way to use the brush is not in a paintbrush motion. Paint-the-fence, Paint-the-fence, up and down, up and down.....NO, no no no no no no, NO!! All this is going to do is move the make-up around and give you a streaky finish. What you want to do is pat the skin with the brush to place the product on the face.

You can also use a fluffy brush to put a liquid or cream foundation on. Yes, I said it, a fluffy brush like the brush you've put blush or powder on with your whole life can be used as a liquid foundation or cream on your face. I love the result of using a fluffier brush. You place the make-up on in a circular motion, working the product on little by little. This will give you a more diffused look, an airbrushed finished. Flawless skin!!! Ooh La La!

When it comes to powder foundation, I would stick to the brushes on the right side of the picture. As you can see, there are a variety of sizes of fluff brushes. This gives you the choice of light, medium, or heavy application. The fluffier the brush, the less product will be placed on the face.

So that has it. Use brushes! I know I'm partial to MAC brushes because they last forever, but if you cannot afford to splurge on a full set or even one brush, stop by your local drugstore and pick up a few to try. I really like the make-up brushes at Target. The Sonia Kashuk make-up tools. They are the closest to my beloved MAC.

Things to remember when using your brushes:

-wash your brushes once or twice a month. More if you apply make-up daily. Use a small amount of make-up removing facial soap or an antibacterial soap diluted in water to wash your brushes. RINSE THOROUGHLY! Make sure you get all the soap out, gently squeeze excess water out, and lay on a paper towel to dry over night.

-don't get discouraged if you are first starting to use the brushes. Just like anything else new, you have to practice. It will come to you and you will notice the biggest difference!

Good luck and let me know if you have any questions.....PLEASE!!?? I haven't heard from very many people on my little posts! :( I love your comments and especially your questions!

Peace out!

Foundation

Make-up, make-up, make-up!!

Our next step in the process is foundation!! How exciting!? That sounded a little sarcastic, but it wasn't meant to be. I love foundation and telling everyone my little secrets about it. As we talked about before, prepping the skin for make-up is very important. Make sure you read about how to do so here and here!

We'll start our lesson today with some of the myths about foundation. When I worked at a make-up counter I had hoards of people telling me how much they hated foundation and that they would never wear it and when they left the counter.....foundation was their best friend. It is all a matter of knowing your skin, knowing what you need, and knowing the proper techniques for application. We should already know about our skin types, so we are going to talk about what kind of foundation you need.

Foundation can be a scary thing, if you don't know what you're looking for. Foundation is a product that is used to correct discoloration in the face and create a blank canvas that is ready for color application and enhancement. You want to make sure you are using a quality product for best results. And remember quality doesn't mean most expensive!!! You can find some great products at your local drug store!

Ok....here's the low down. There are several types of foundation to choose from. You have options of coverage and formula. Here is a list of the different options and their descriptions:

Coverage Types

Sheer - This foundation is very lightweight with minimal coverage. It is used for those who don't need a lot of color correction on the face and is the least noticeable.
Medium - This foundation is the standard coverage formula. Not to much and not too little. This foundation is usually buildable, meaning you can have anywhere from a light to medium coverage in one foundation depending on how many layers are applied.
Full - This is the most coverage one can get. I don't like to use the term "heavy" because people mistake this for the weight of the make-up. Many full coverage are heavier than a sheer foundation, but aren't much different. This foundation will completely cover the skin and create an opaque canvas.

Foundation Formulas

Liquid - Liquid foundation is one of the most popular types of foundation. It comes in a wide variety of colors, coverages, finishes. Can be used for all skin types, especially dry.

Cream - Great choice for those who have dry skin. Medium to full coverage. Many people ask for a "cream-to-powder" but my experience with those aren't the best. They tend to be a little more drying to the skin. Instead you can get a cream foundation with a matte finish instead of one that leaves you looking shiny.

Powder - I love a good powder foundation. Make sure to note the difference in a powder foundation and a setting powder for oil absorption. A powder foundation gives more coverage and does NOT need to be placed over another foundation unless you are looking for extremely heavy duty coverage. Good for normal to oily skin.

Mineral - Mineral make-up is great for all skin types. If you are looking for a lot of coverage, this might not be the product for you.

Hopefully this information will help you figure out just what you need for your skin type! If you have any questions, please don't hesitate to ask! I will answer as best I can. I had one question from my first make-up blog that I wanted to answer.

"This is a brilliant post! I love St Ives Apricot scrub as well. The primer tip is great though - I'll have to try that! What do you recommend as a good long lsting foundation? I am currently running about 4 trying to find the perfect one! I find Bobbi Brown Luminous comes off by lunch time and is shiny and makes my skin look sallow, Double wear is great but too heavy ... Look forward to hearing your tips! ~ Europafox"

For a long lasting foundation, first use the primer. What this does is prevents the face from absorbing all your make-up. When you go through your day and it seems like your make-up is wearing "off", it is really disappearing into your pores! So use your primer! I have used several foundations on the market and I am hooked on M.A.C. they have a ton of great foundations that match every skin color and are long lasting. I would recommend a foundation that isn't a satin finish. If you like liquid, try studio fix fluid. It is a medium coverage, natural matte finish. It won't add excess shine and pairs well with the primer. If you like a cream, try studio tech. It is also a medium coverage, natural skin finish. It wears a little heavier than the studio fix fluid. And lastly, if you like powder, try just plain studio fix. It is their powder foundation that is amazing! It has great longevity if paired with the primer.

Another thing that might be causing the make-up to come off is how you are applying the foundation. It is very important to use a brush to put all color on the face. It reduces oil production and allows for proper placement of the product. I will talk more next week about the proper application of foundation, but for now, I hope this helps! Thanks so much for the question, Europafox!!

So there you have it! Hope you enjoyed this long post....please let me know what you think! Have a great Monday and see you soon!!

Determining your skin type!

Last post we discussed preparing the face for make-up. Cleansing, moisturizing, and priming the skin are three very important things that need to be done before you apply make-up. Before we get started on the foundation, I want to talk a little more about the skin. Everyone has a different skin type, which means everyone will have a different ritual before make-up application and everyone will wear different make-up types.

To choose the proper foundation, one needs to determine the right skin type.

Normal Skin Type: In normal skin, the oil glands produce sebum at a moderate rate, resulting in a balanced state, not too oily and not too dry. Normal skin looks consistently plump, moist, and vibrant. This skin type has the privilege of being able to wear any and most make-up.

Dry Skin Type: Dry skin is caused by under or inactive oil glands that do not produce enough sebum to keep the skin naturally lubricated. It usually has a dull appearance, feels dry and itchy and is sometimes sensitive. This skin type must stay away from anything to drying when it comes to foundation, but has the privilege of being able to wear make-up with natural oils in them.

Combination Skin Type: Most people have at least two different types of facial skin at any given time. The combination of skin is frequently characterized by an oily "T-zone" (forehead, nose, and chin) with the skin around the cheeks, eyes, and mouth tend to be dry to normal.

Dehydrated Skin Type: This is the most misdiagnosed type of skin. Most people feel they have dry skin, because it is flaky. Having flaky skin is the biggest characteristic of dehydrated skin. It is a build up of sebum that usually occurs around the nasal folds or cheeks. This just means that you need to drink more water! This problem can be treated with a prescription of 8 glasses of water a day and continuing a good regiment of cleansing and moisturizing.

Oily Skin Type: Oily skin is cause by overactive oil glands. Too much sebum is produced, resulting in skin that is greasy and has a wet appearance. Oily skin types are prone to develop acne and clogged pores. Despite these drawbacks, oily skin generally remains younger looking over time. My secret tip for dealing with oily skin is to treat it with more oil. Most oily skin types choose to cleanse their skin with anything and everything that will strip the oil from their faces and steer clear of products with oil. So here's the secret, what does oil repel? Water, right? So why would you cleanse your face with a water based product? I have found that that using a regiment of Cleanse Off Oil and Green Gel Cleanser has proved to keep oily skin in check.


A few pumps of the Cleanse Off Oil mixed with a little bit of water, carefully mix together and begin to work over the face just like a normal cleanser. Rinse with water and then dry face with a towel. Alternate this with the Green Gel Cleanser, using one on day one and the other on day two. You might find you like one better than the other, which is definitely ok! Remember you can always stop by your nearest M.A.C. counter and ask for a sample and talk to there artist for more information.

Here are the product descriptions from maccosmetics.com:

Cleanse Off Oil
An industry-strength oil-based makeup remover that's gentle on the skin. Botanically formulated with oils of olive fruit, evening primrose and jojoba seed and absolutely 100 percent mineral-oil free. Massages onto the skin to loosen all makeup, including waterproof mascara. Emulsifies into a lotion-type liquid with water: rinses off easily, no tissues required - and no residue! Protects with vitamin E. Skin softening and conditioning. Good for all skin types.

Green Gel Cleanser
Fresh, vibrant, skin-tingling cleanser with refreshing extracts of cucumber and algae. Full-on foam, yet delightfully soap-free. Conditions, nourishes and hydrates leaving skin clean, clear, smooth and protected. For a blast of freshness for the skin; just activate with water.


Now you have the basics for learning about your skin. I know its not the most fun topic, but it is kind of like having to learn the alphabet before you can learn to read. You have to know the building blocks. I hope you find this post helpful and I would love to hear what you think. If there is anything you need to know about make-up or your skin, don't hesitate to ask. If I don't have the answer, I will find someone that will!! Happy reading and enjoy your week!